PTLevel Cistern Setup

In this article, we will go over how to setup a Long Range Wireless PTLevel used to monitor water in a common cistern for household water use. The Long Range Wireless PTLevel can achieve up to 1km of range, comes with 13' of tubing, and the transmitter can be installed outdoors.

Check out our information on installations in Septic Systems and Chemical Pails.

Download a copy of the instruction manual for the Long Range Wireless PTLevel.
Installing a PTLevel can be broken down into 3 main steps:
1. Powering the device
2. Connecting to WiFi
3. Installing the Pressure Chamber
This article is going to break every step into lots of details and pictures. Feel free to skip ahead to the parts of the article that apply to you!
1. Powering the PTLevel
The Long Range Wireless PTLevel comes with 2 parts that need to be powered; the Receiver that plugs in (4V to 16V DC input range, 110V - 220V 50/60Hz Wall adapter - 8v DC 500mA output) and the Transmitter that takes 4 AA batteries (included).
1. Plug in your Receiver
Choose a location to plug your Receiver in that is close to your router, or somewhere where you have a strong WiFi signal. Ideally your Receiver should be installed above-grade (not in a basement) in order to support the longest range possible. The Receiver is not weather-resistant.
Before you take your Transmitter to your tank, it is best to install batteries when you are indoors still and make sure the Receiver and Transmitter are linked.
2. Install the transmitter batteries
Install 4 AA batteries in your Transmitter (provided) and screw the lid down tightly. It's best to wait to install your Transmitter on your tank until after you've connected your device to WiFi.
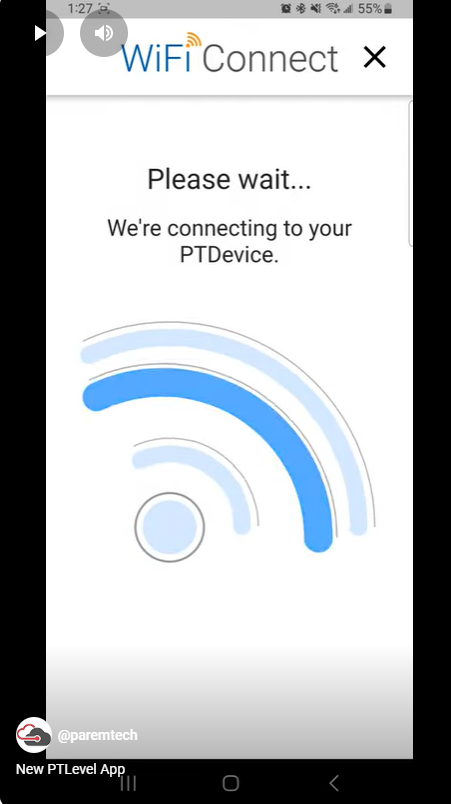
2. Connecting to WiFi
Our new iOS and Android App makes the connection process easy!
1, Download the PTDevices App
2. Setup a new device.
Watch a quick overview here: https://youtube.com/shorts/Oux8kUAs0NM?feature=share
a. Press the 3 lines in the top left to access all your options, then select "Setup Device"
b. When asked "How can I help you?" select "New PTDevice", then select the kind of device you have. For this walk-through we are reviewing the Long Range Wireless, so you can select "Long Range"
c. Confirm you have 2.5 Ghz WiFi
If not, check out these instructions on how to split your 5gHZ or mesh 2.4/5Ghz to create a single 2.4Ghz network just for devices like the PTLevel, https://support.paremtech.com/portal/en/kb/articles/the-ptlevel-and-2-4ghz-internet-wireless
d. Plug your Receiver into an outlet.
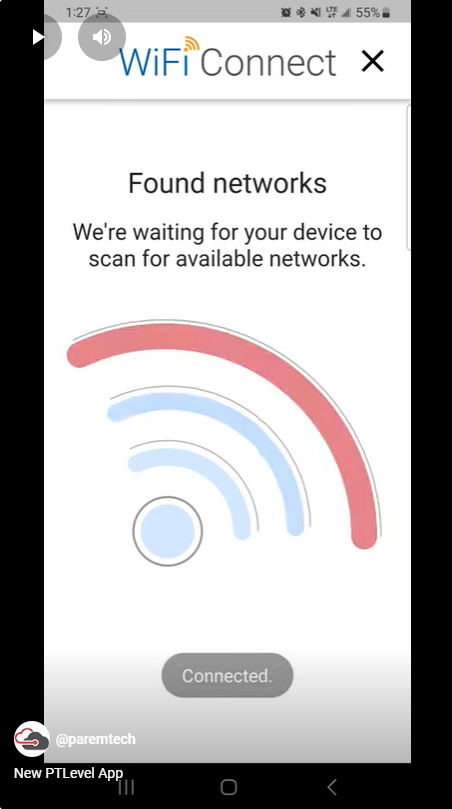
e. Scan the QR code
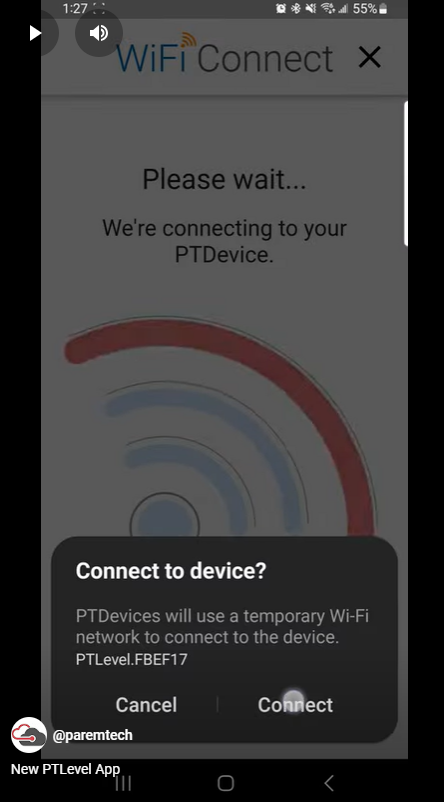
f. Through the next few steps, you're going to give the PTLevel permission to use your WiFi
In the second picture, when the app asks "Connect the device?", click "Connect".
g. Select the network you want your PTLevel connected to, enter your password, and then click "Connect".
If you have a hidden network, select "Add network".
If you have additional firewalls, VPN's, or high-level security settings, you may have to create a special guest network on your router for devices like the PTLevel to securely connect to.
h. Success, your PTLevel has been connected to your WiFi!
Your device automatically and is now being added to your account!
For it to fully add to the account, make sure to press the transmitter button. The Transmitter will blink once for pressing the button and then 3 times slowly to confirm it reported in.
3. Installing the Pressure Chamber
Installing the pressure chamber is the fun part! The pressure chamber is made of durable PVC and Portland Cement, both materials already used in cisterns. The tubing is made of UV-protected polyurethane.
1. Select a spot for the tubing and drill a hole if needed
In a cistern like the one pictured, there are 2 main choices for installing the tubing; one is the plastic cistern cap and the second is directly through the cement side of the cistern. If you opt for the cement side, you will need a drill and drill bit capable of drilling through cement. If you have an older cistern that has a cement lid, you can often just leave the tubing through the main hole, just try not to crush it with the lid.
In this case, we've selected to drill a small hold through the lower part of the plastic cement cap. The outer diameter of the tubing is 0.093in inside diameter.
2. Thread the tubing through the hole, then attach to the pressure chamber
To attach to the pressure chamber, make sure you've put the tubing through the cap first. Then warm the end of the tubing (with a lighter) if needed or just press onto the pressure chamber. Then tighten the cap on the pressure chamber to hold the tubing tight and in place.
3. Lower the pressure chamber into the cistern
4. Within the App you can add tank settings, etc
First, once the pressure chamber is lowered into the tank, press the button on the transmitter. This will give you the most up to date reading in your account.
Second, select "Settings" within your account and enter your tank depth. The tank depth is the depth your tank would be at if you were at 100% full. Most people do not include their "fill pipe" in this calculation.
Enter the depth and units of measure, then scroll to the bottom and press "Save Settings". This can be done within the App or on a browser (by logging into your ptdevices.com account).
5. Since you've changed your settings, press the button on the transmitter and then refresh your app/browser.
6. Calibrate
After you've set up the device you should calibrate it. However, sometimes the percentage is right-on so you don't need to calibrate.
You can only calibrate if your tank is showing more than 20% full. Read all about calibrations here: https://support.paremtech.com/portal/en/kb/articles/calibration-procedure
We stand behind what we sell, so reach out to us with any problems by putting in a support ticket.
You have a 2 year warranty, so you can be confident in your purchase!

Related Articles
Level Reading Maintenance - Long Range Wireless PTLevel
Now that you have your PTLevel setup, you’re probably wondering what to do over time in order to maintain the device and it’s readings. There’s really not much to do, but as with everything, a little bit of maintenance goes a long ways. Maintenance ...What is the Range on the PTLevel Wireless?
We use a special low power very long range radio technology in our Wireless PTLevel devices. With the provided antennas which are built in, you can achieve up to 1km range or more depending on what is in between. We have customers who have their ...Wireless Device Installation Instructions
This article is for downloading the Long Range Wireless PTLevel Instruction Manual. You can download our English, French, and Spanish language instruction manuals below. To learn the step-by-step process of installing the device in a cistern, with ...How do I interpret the data from my cistern liquid level monitoring system?
Interpreting data from a cistern liquid level monitoring system involves understanding the readings provided by the system and making informed decisions based on those readings. We've created a guide to take you step-by-step through understanding the ...High Water Alarm for Sump Pump
High Water Alarm for Sump Pump: How the PTLevel Can Help When it comes to protecting your basement or crawl space from water damage, a sump pump is the first line of defense. Adding a high-water alarm and a monitoring device like the PTLevel can ...